Booting Sun SPARC Servers
Poking NVRAM like it's 1994
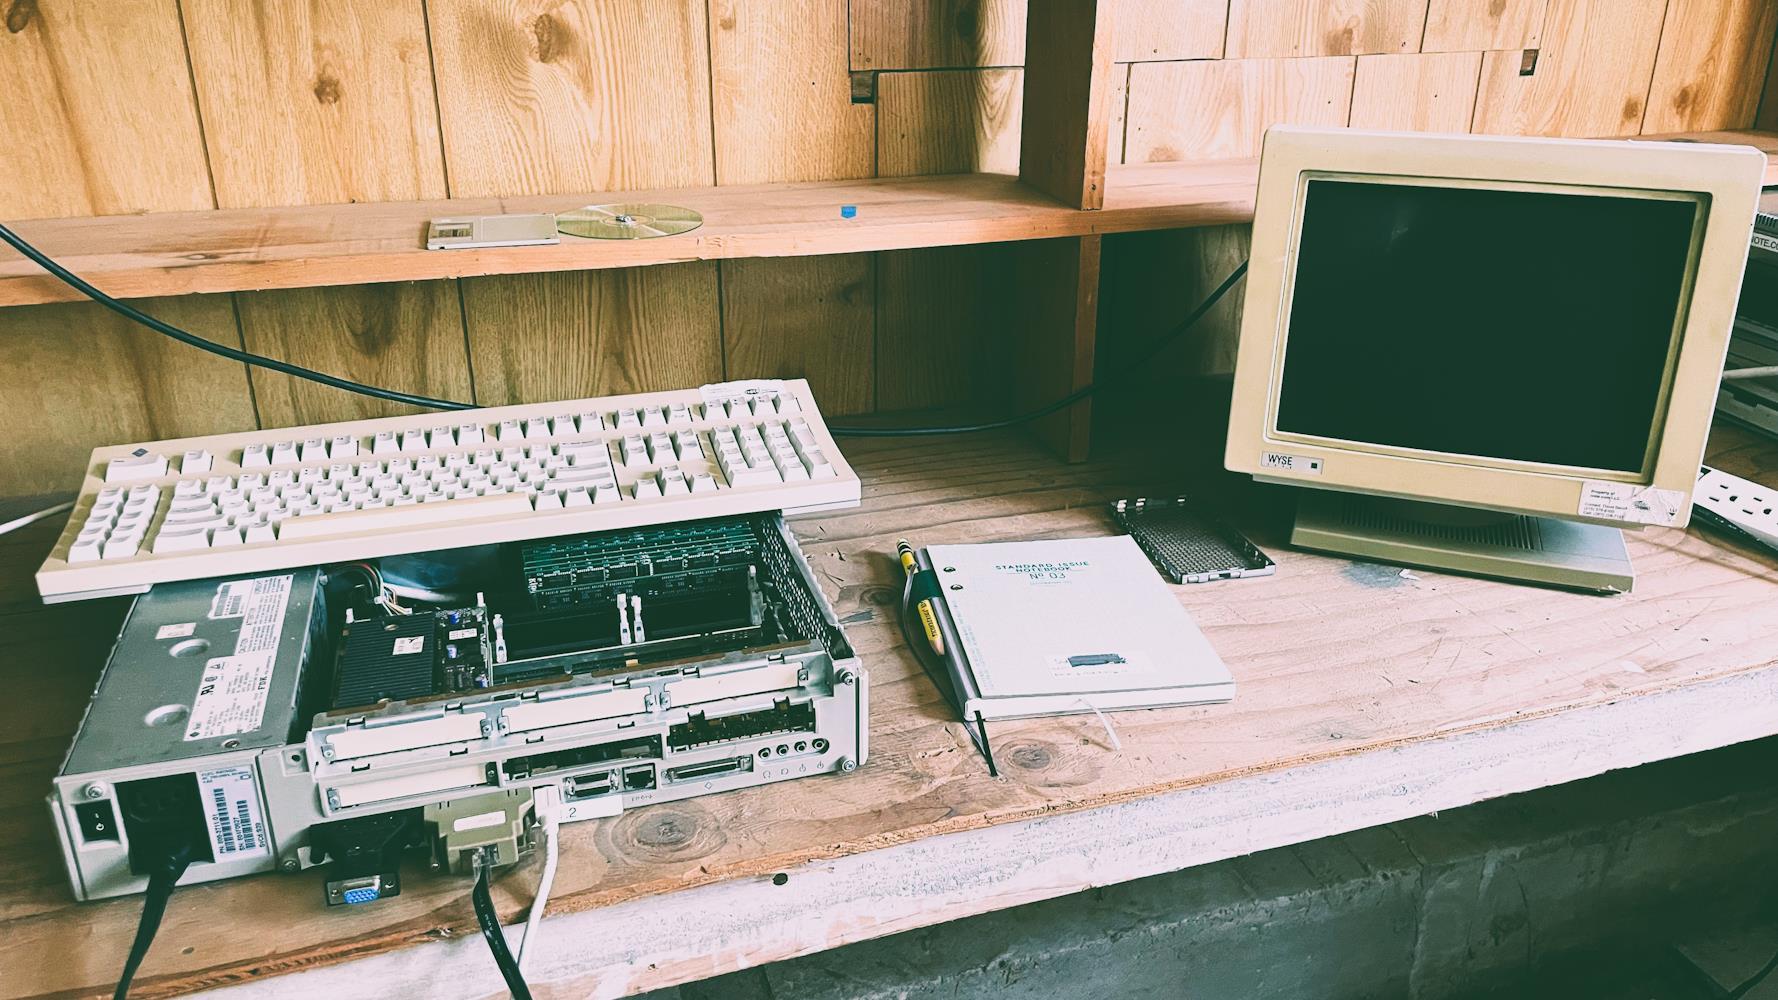
In early 2022 I got several Sun SPARC servers for free off of a FreeCycle ad: I was recently called out for not providing any sort of update on those devices… so here we go!
The Devices
| Name | Released | Original MSRP | Inflation-adjusted (2024) |
|---|---|---|---|
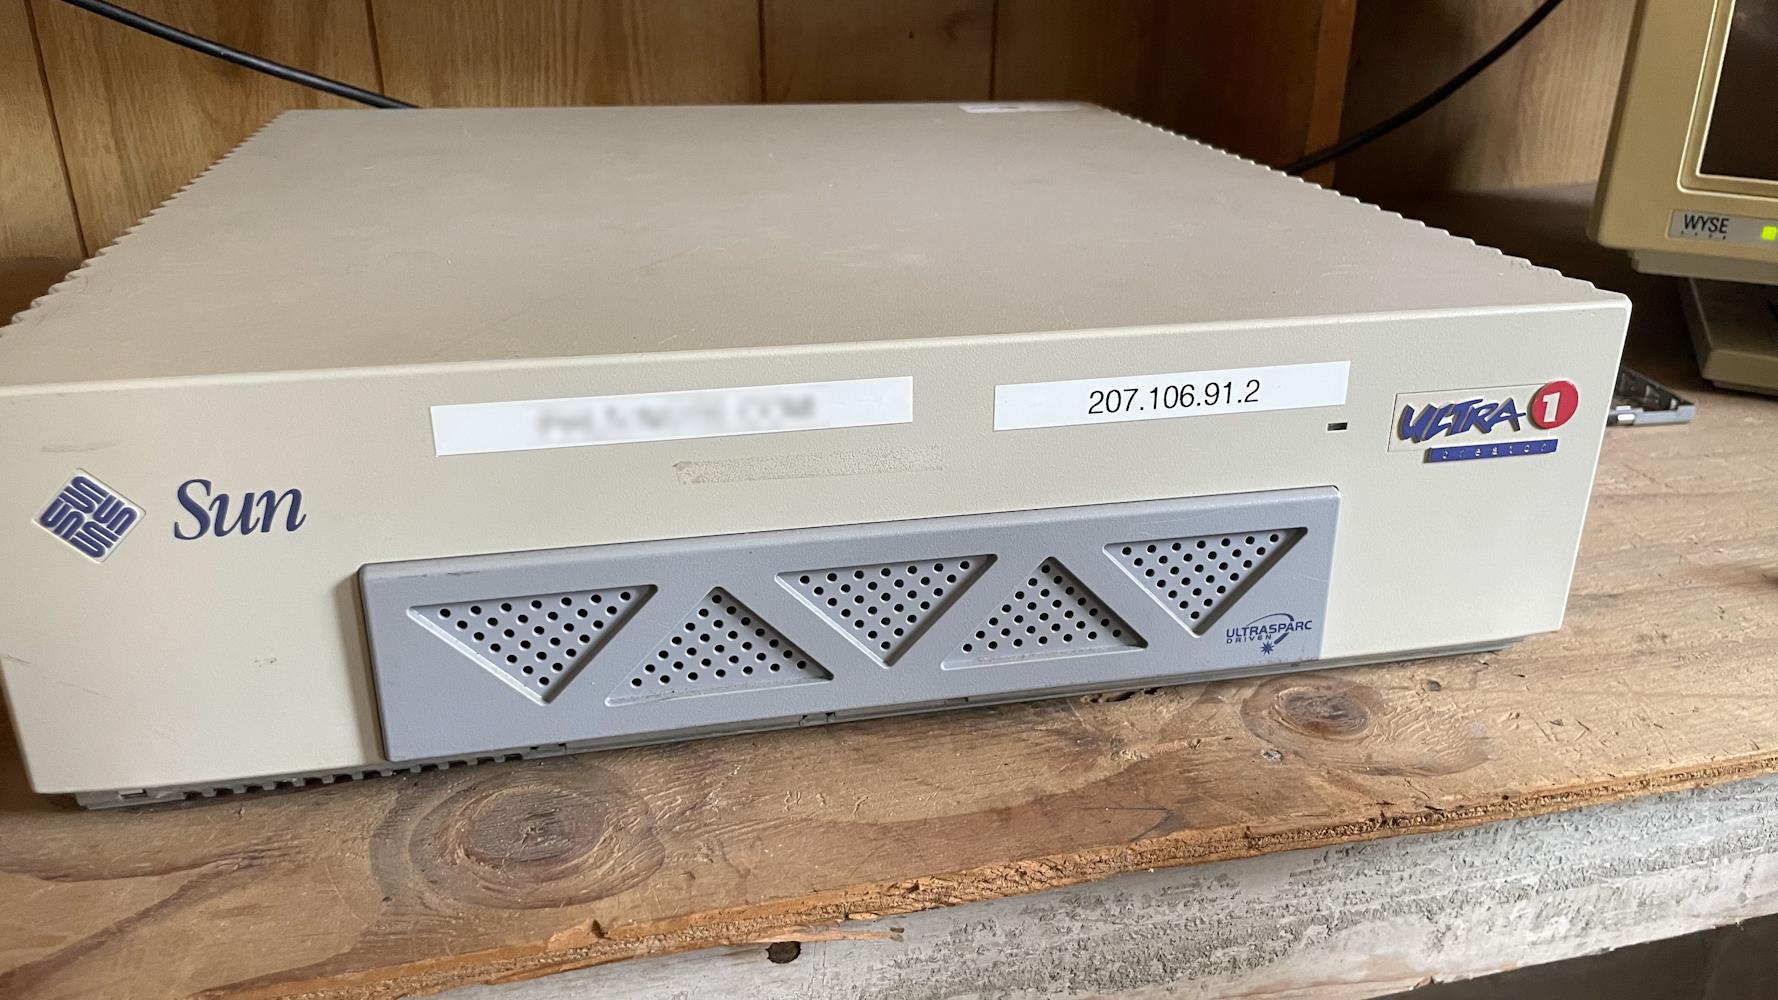
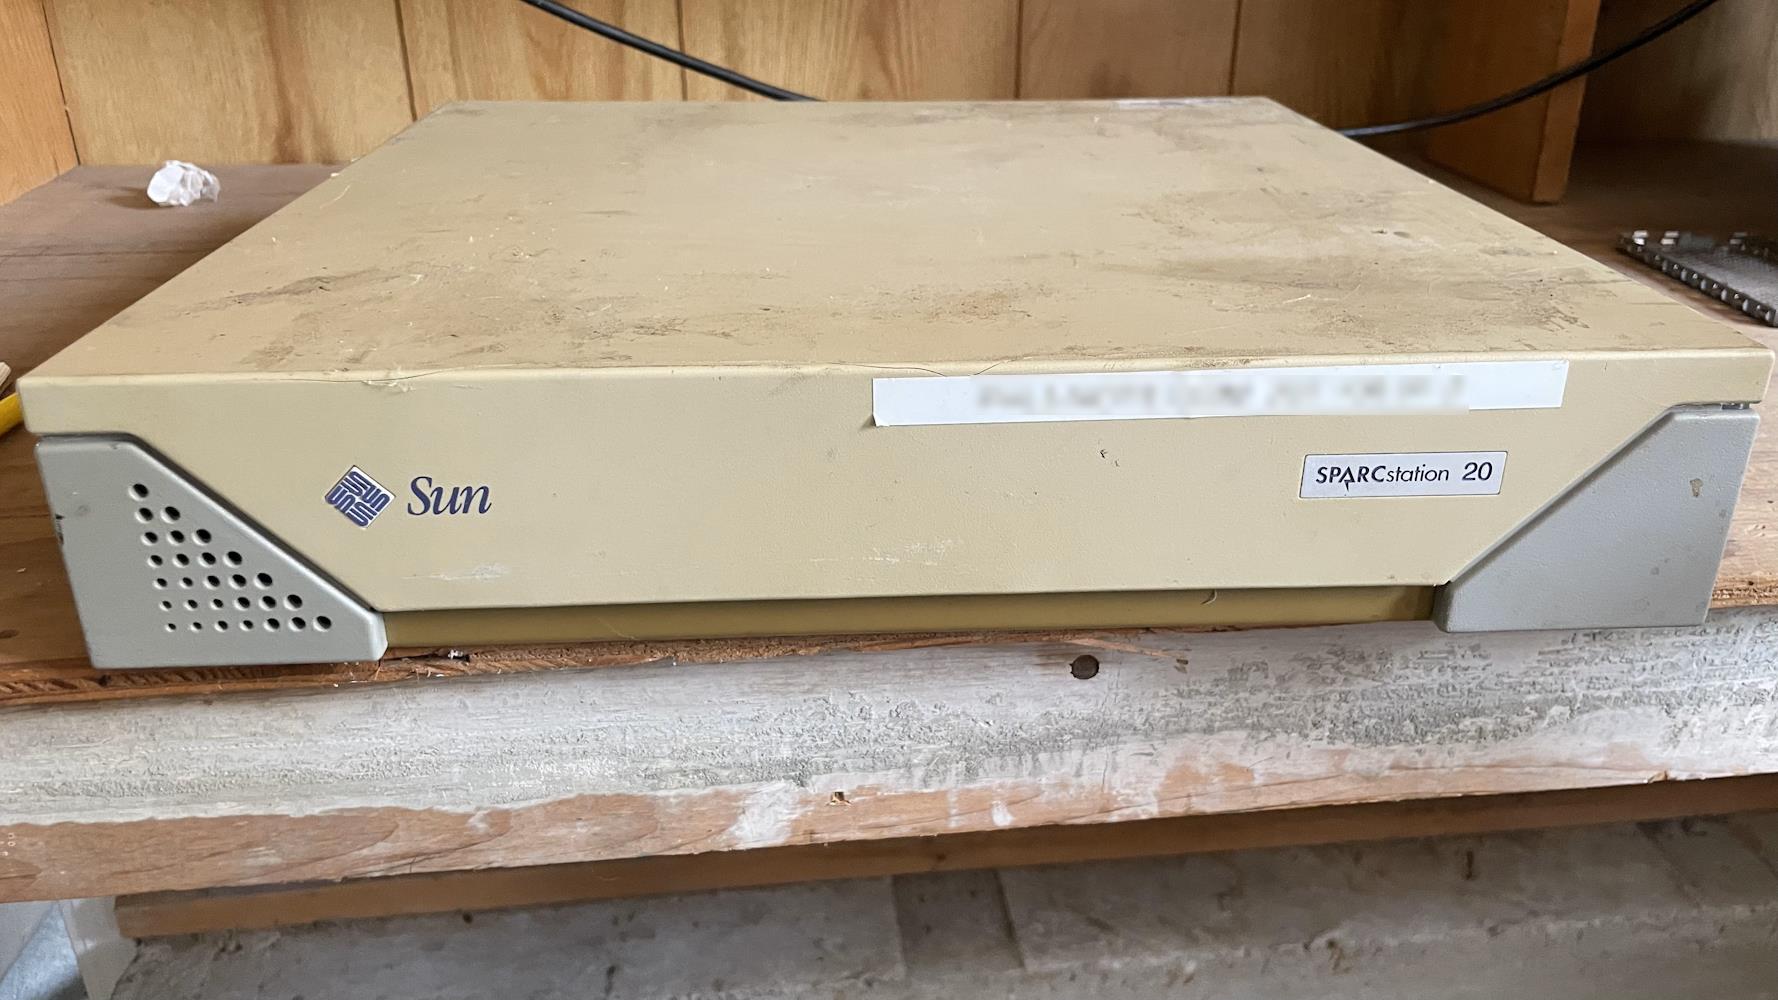
| SPARCstation 20 | Mar. 1994 | $12,195 | $26,080 |
| Ultra 1 Creator | Nov. 1995 | $25,995 | $53,276 |
| Axil Ultima 1 | Sep. 1996 | $9,995 | $19,939 |
NVRAM Woes
 Click to zoom.
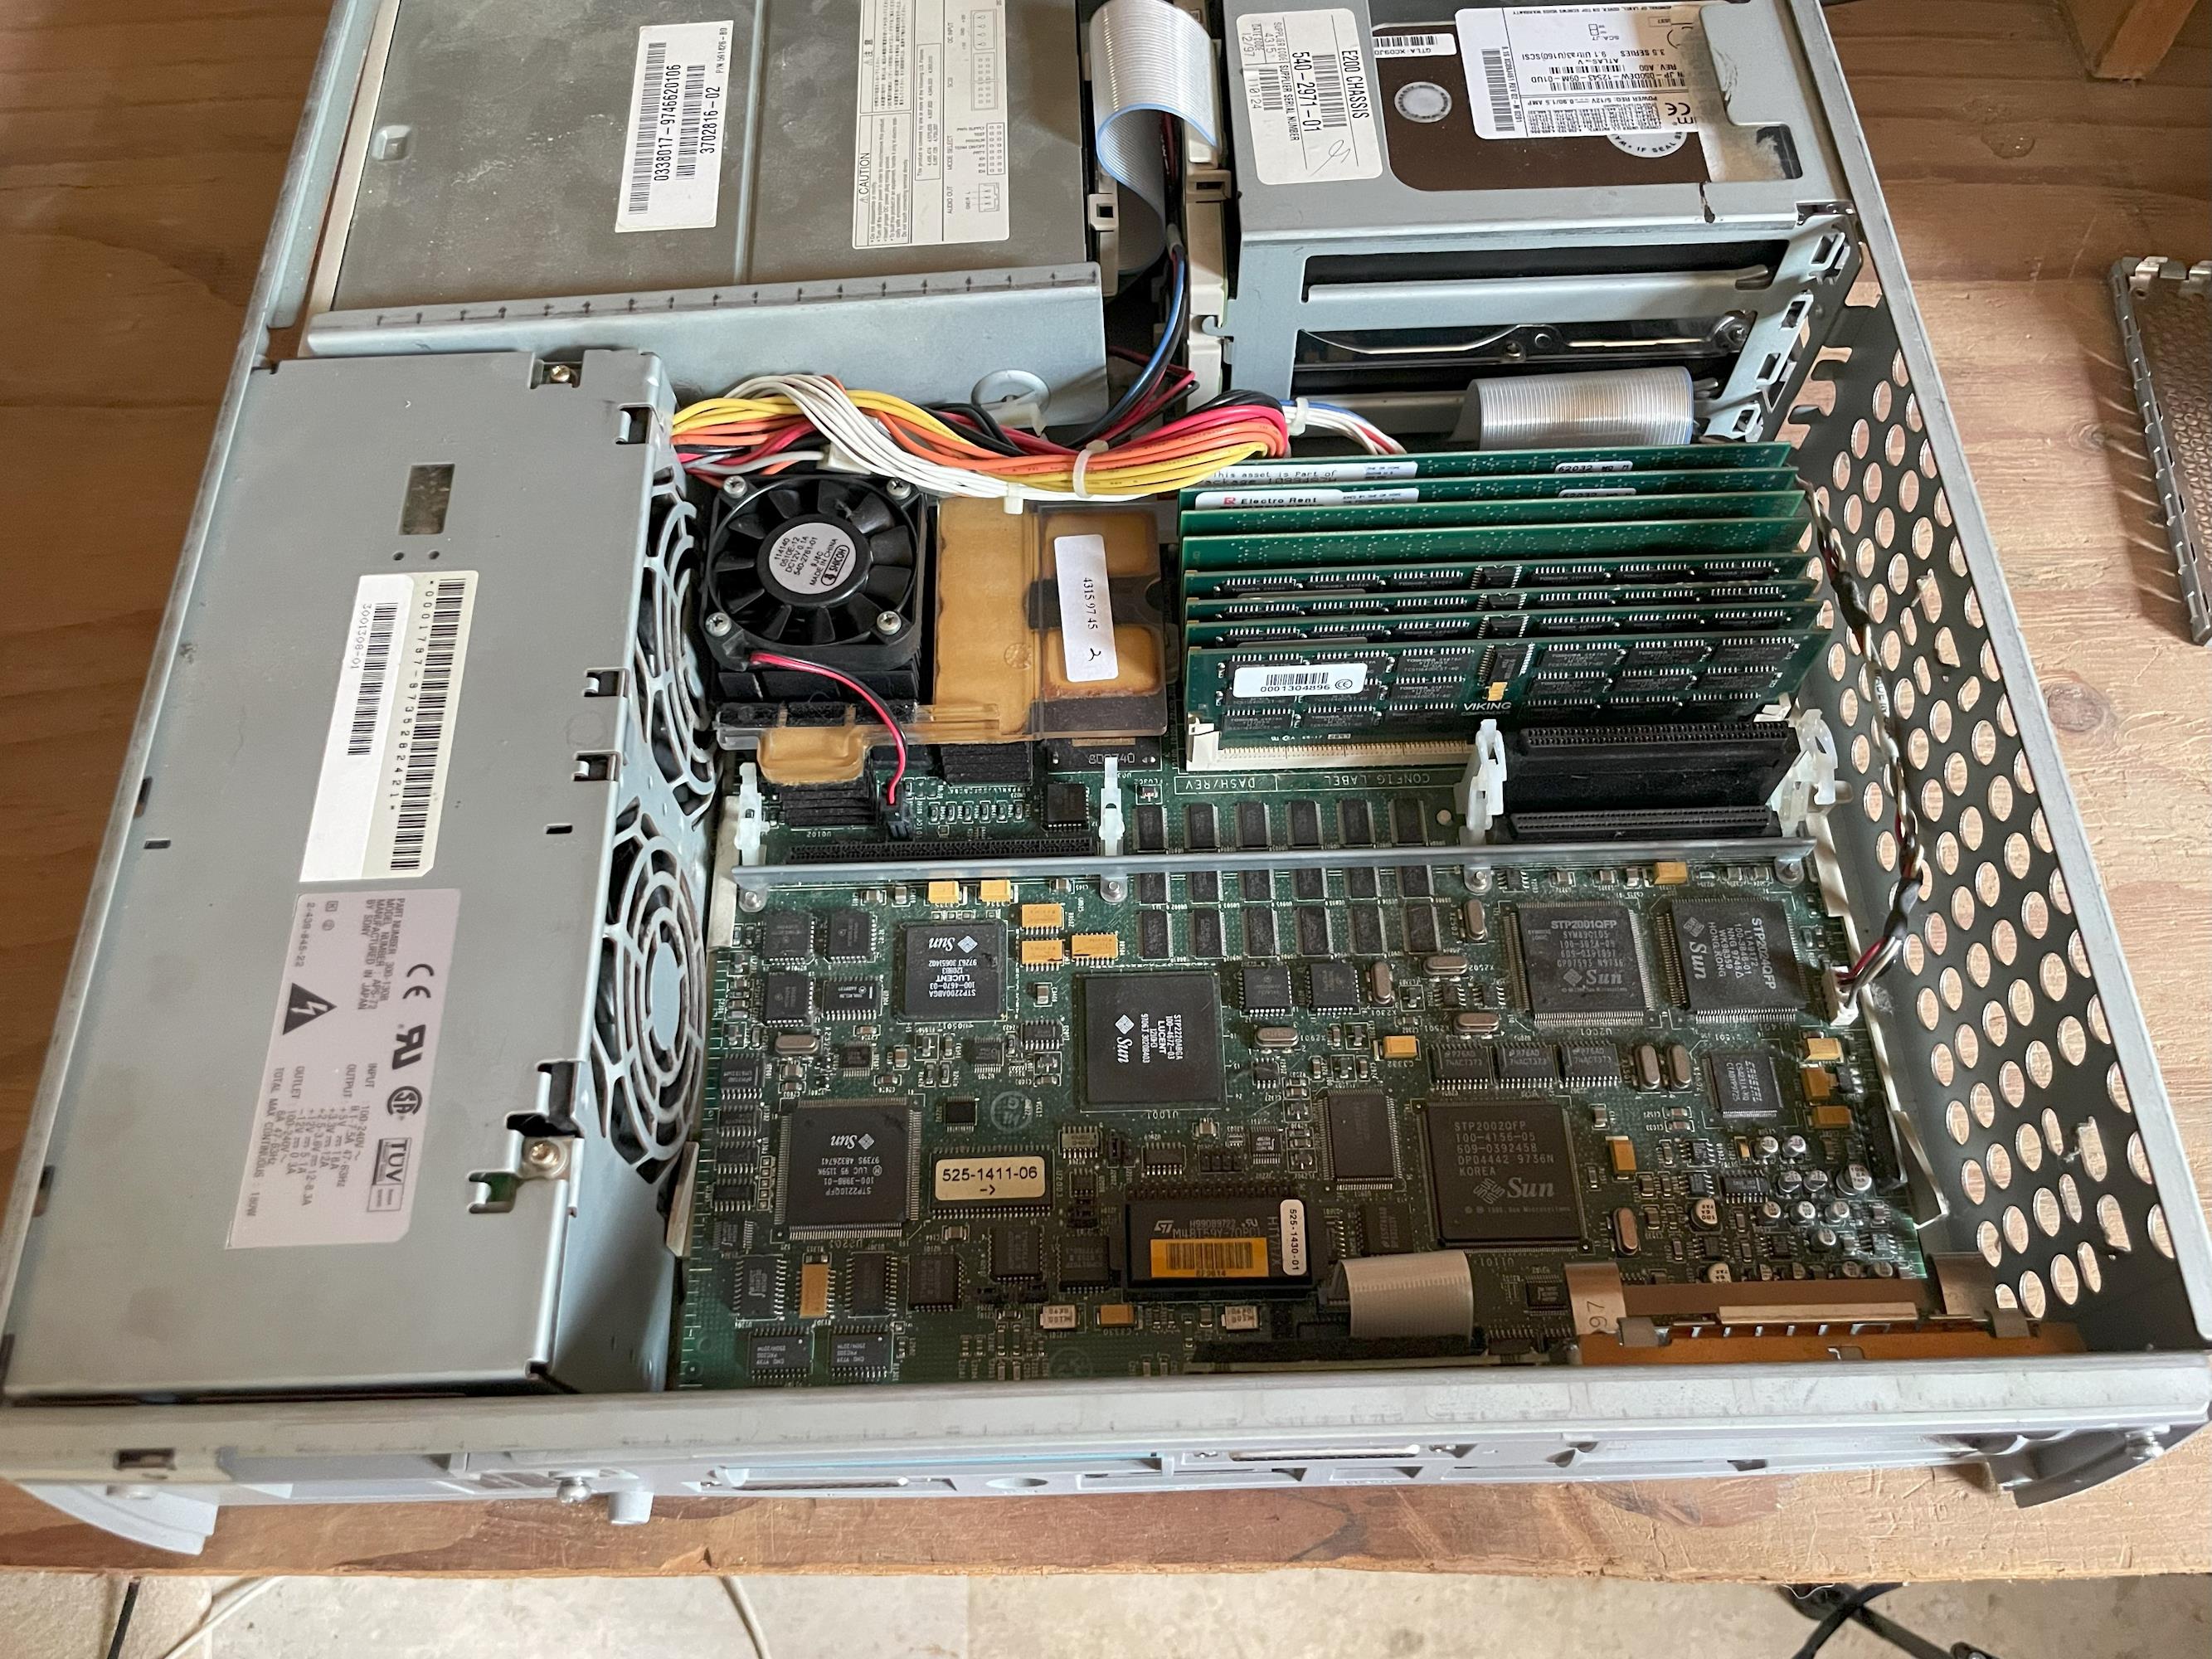
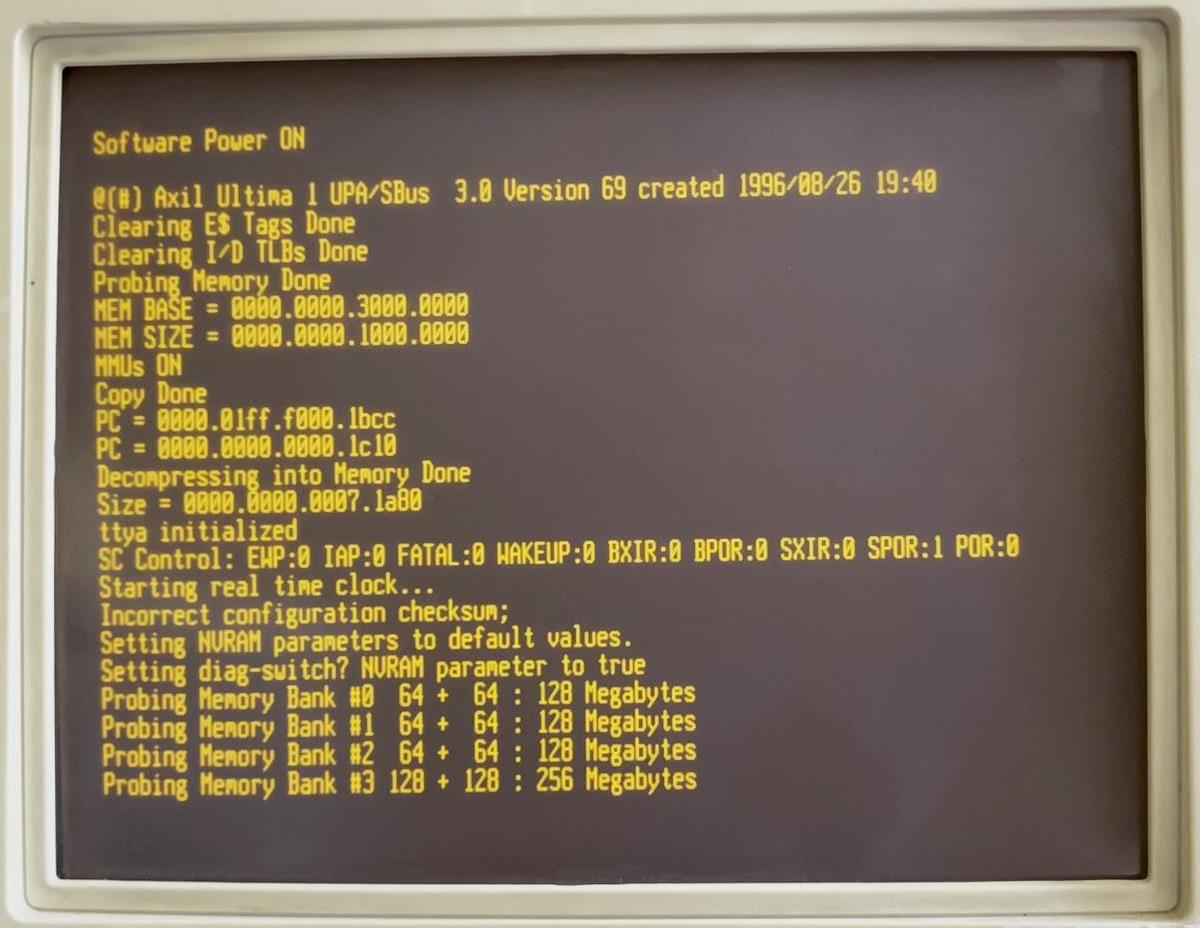
Sun SPARC machines store some of their BIOS configuration in a chip called an NVRAM, a special type of writeable random access memory that does not clear its contents when the machine powers off. This is usually a small RAM chip with its own internal battery that recharges when the machine is running. Unfortunately this means that when the devices is powered off for extremely long periods the NVRAM loses its values. Even more unfortunately, over time the NVRAM battery degrades to the point where it can no longer be recharged, and every power cycle results in a compete configuration wipe.
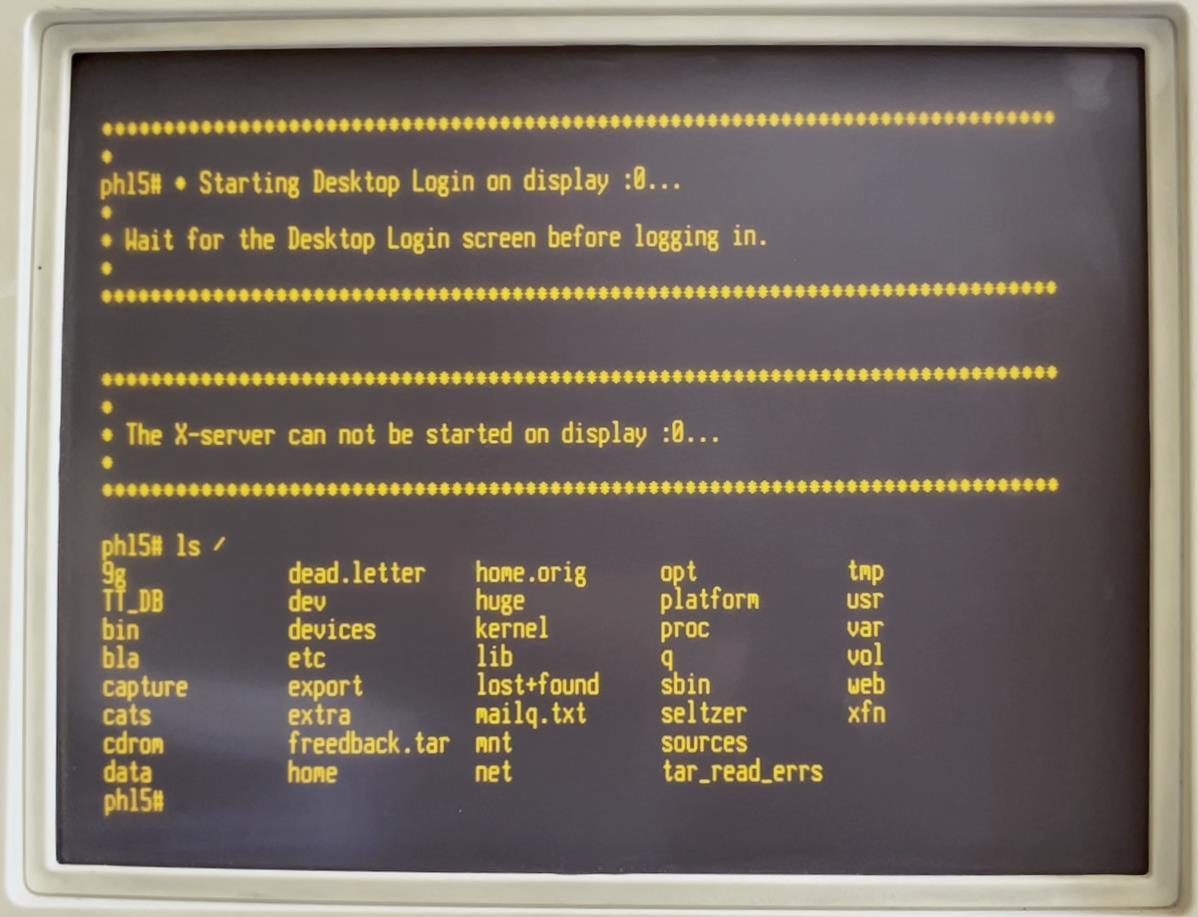
Such is the case with my SPARC machines; upon powering on we’re greeted with a sad message.
Incorrect configuration checksum; Ethernet address ff:ff:ff:ff:ff:ff, Host ID: ffffffff. The IDPROM contents are invalid
means that our NVRAM has been cleared (the term IDPROM is a historical artifact – older Sun architectures used a
PROM chip instead of an NVRAM chip). Thankfully, there’s a process in
place to restore it manually by entering NVRAM values by hand. Here’s the general process:
- Boot your Sun SPARC machine. When you see the
The IDPROM contents are invalidmessage, press STOP+A (STOP is a special key on Sun keyboards). This should drop you to theokprompt, which is the OpenBoot debugging prompt. -
Now we’re going to poke values into our NVRAM using the
mkpcommand. This command has a format<value> <location> mkp. Here’s the layout of NVRAM, or at least the parts we care about:Location(s) Description 0 Always 1(format/version number).1 First byte of HostID (machine type1). 2–7 6-byte ethernet address (first three bytes should be 80:00:20).8–b Date of manufacture (can be zeros). c–e Remainder of HostID. f IDPROM checksum - bitwise exclusive-or of locations 0–e. So let’s start poking values into NVRAM:
ok set-defaults
ok 1 0 mkp
ok 80 1 mkp
ok 8 2 mkp
ok 0 3 mkp
ok 20 4 mkp
ok c0 54 mkp
ok ff 6 mkp
ok ee 7 mkp
ok 0 8 mkp
ok 0 9 mkp
ok 0 a mkp
ok 0 b mkp
ok c0 c mkp
ok ff d mkp
ok ee e mkp
ok 0 f 0 do i idprom@ xor loop f mkp
Locations Values 0–7 0180080020c0ffee8–f 00000000c0ffee??That last line is a small function that will generate the checksum that goes in location
f. -
Enter
bannerat theokprompt. This will print out the system banner, and allow us to validate that the values we’ve entered are correct. If all is well, you should see something like this:ok banner Sun Ultra 1 UPA/SBus (UltraSPARC 167MHz), Keyboard Present OpenBoot 3.7, 384 MB memory installed, Serial #12648430. Ethernet address 8:0:20:c0:ff:ee, Host ID: 80c0ffee.If, instead, you see a message like
The IDPROM contents are invalidafter the banner, then either the checksum is wrong (check that you typed it correctly!) or the first byte of the HostID is incorrect – this byte specifies the machine type, and must match the machine you’re trying to boot1. Don’t forget to re-generate the checksum after updating any of these values! - Finally enter
resetat theokprompt, which will restart the boot process. Because we haven’t lost power, however, the NVRAM will retain the values we’ve set. Wait for the machine to boot. This can take quite a while, especially if there is a lot of RAM in the machine. Pro tip, plugging an ethernet cable between the Sun server and another machine can help here – otherwise the Sun server can spend a lot of time complaining aboutSUNW,hme0: Link Down - cable problem?. I plugged the Sun Ultra 1 into a powered on Raspberry Pi 3b and it stopped complaining. - Eventually you’ll be brought to a Unix login, assuming the machine is running Solaris. If you know the password,
great; if not, things get tricky2.
Once logged in, you can set the date and time (for as long as the machine is
powered on, anyways) at the
root#prompt withdate 1004102024(in formatmmddHHMMYY).
Results
Sun Ultra 1 Creator
The Sun Ultra 1 was the first machine I tried to boot, and so far the only one to successfully fully boot.
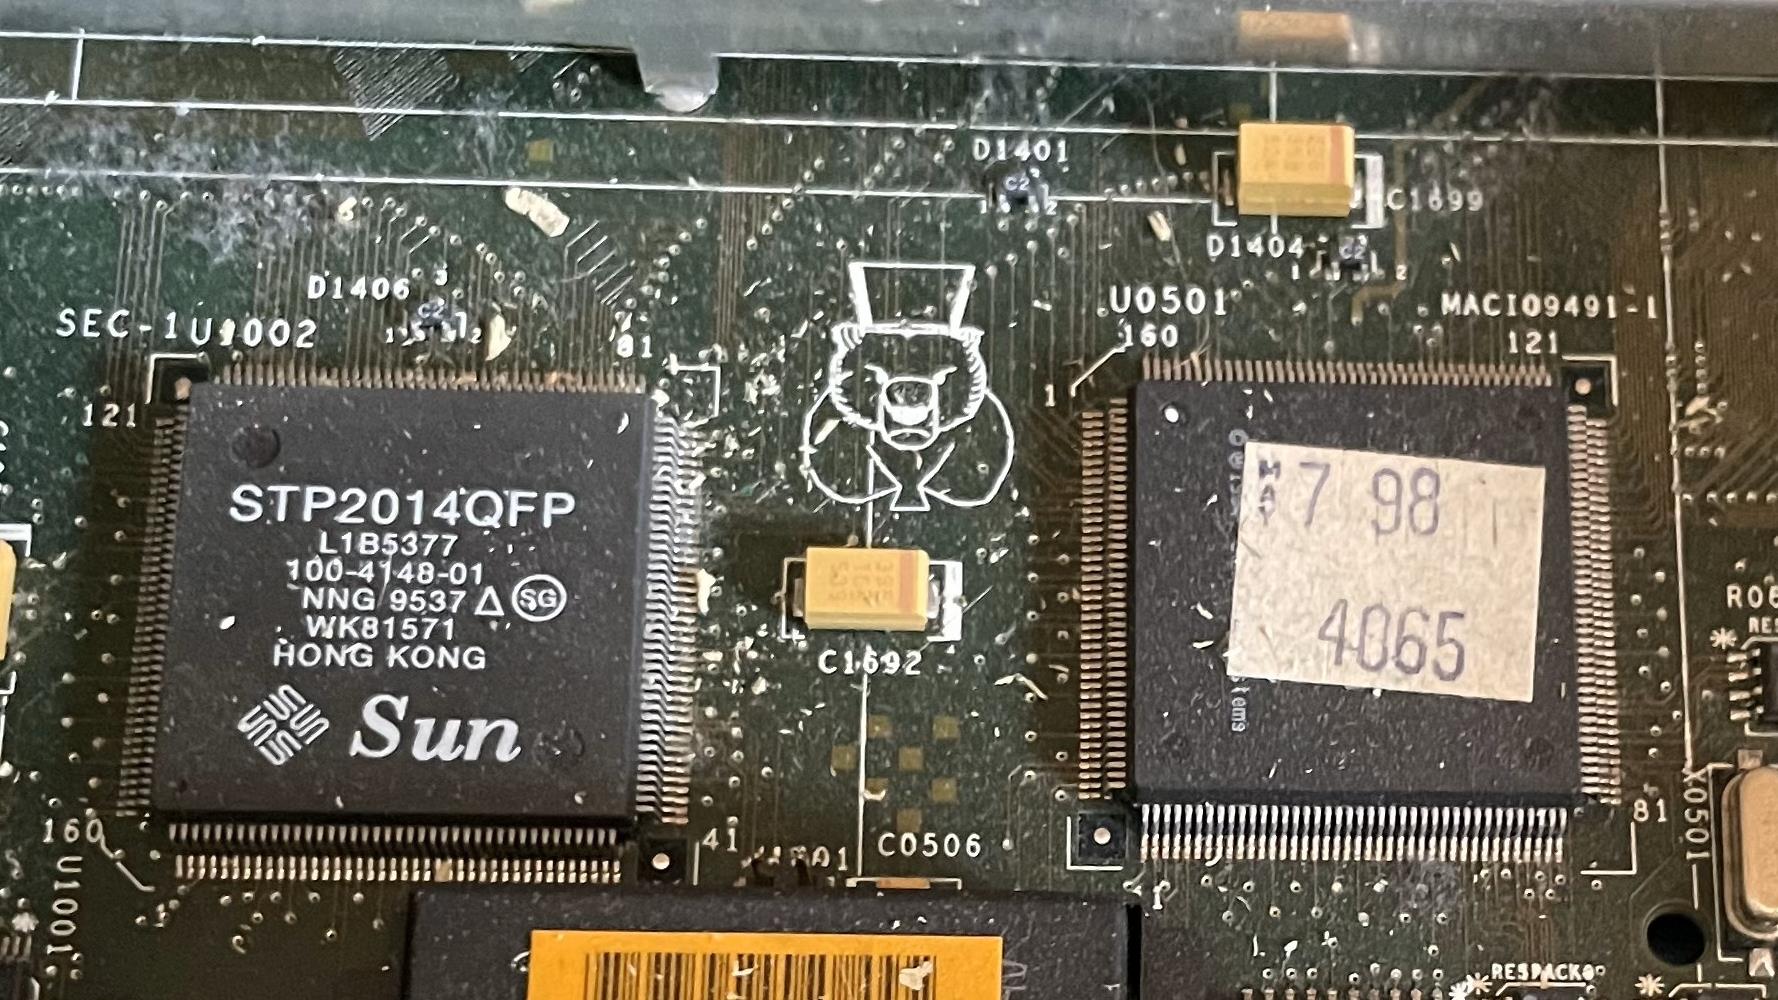
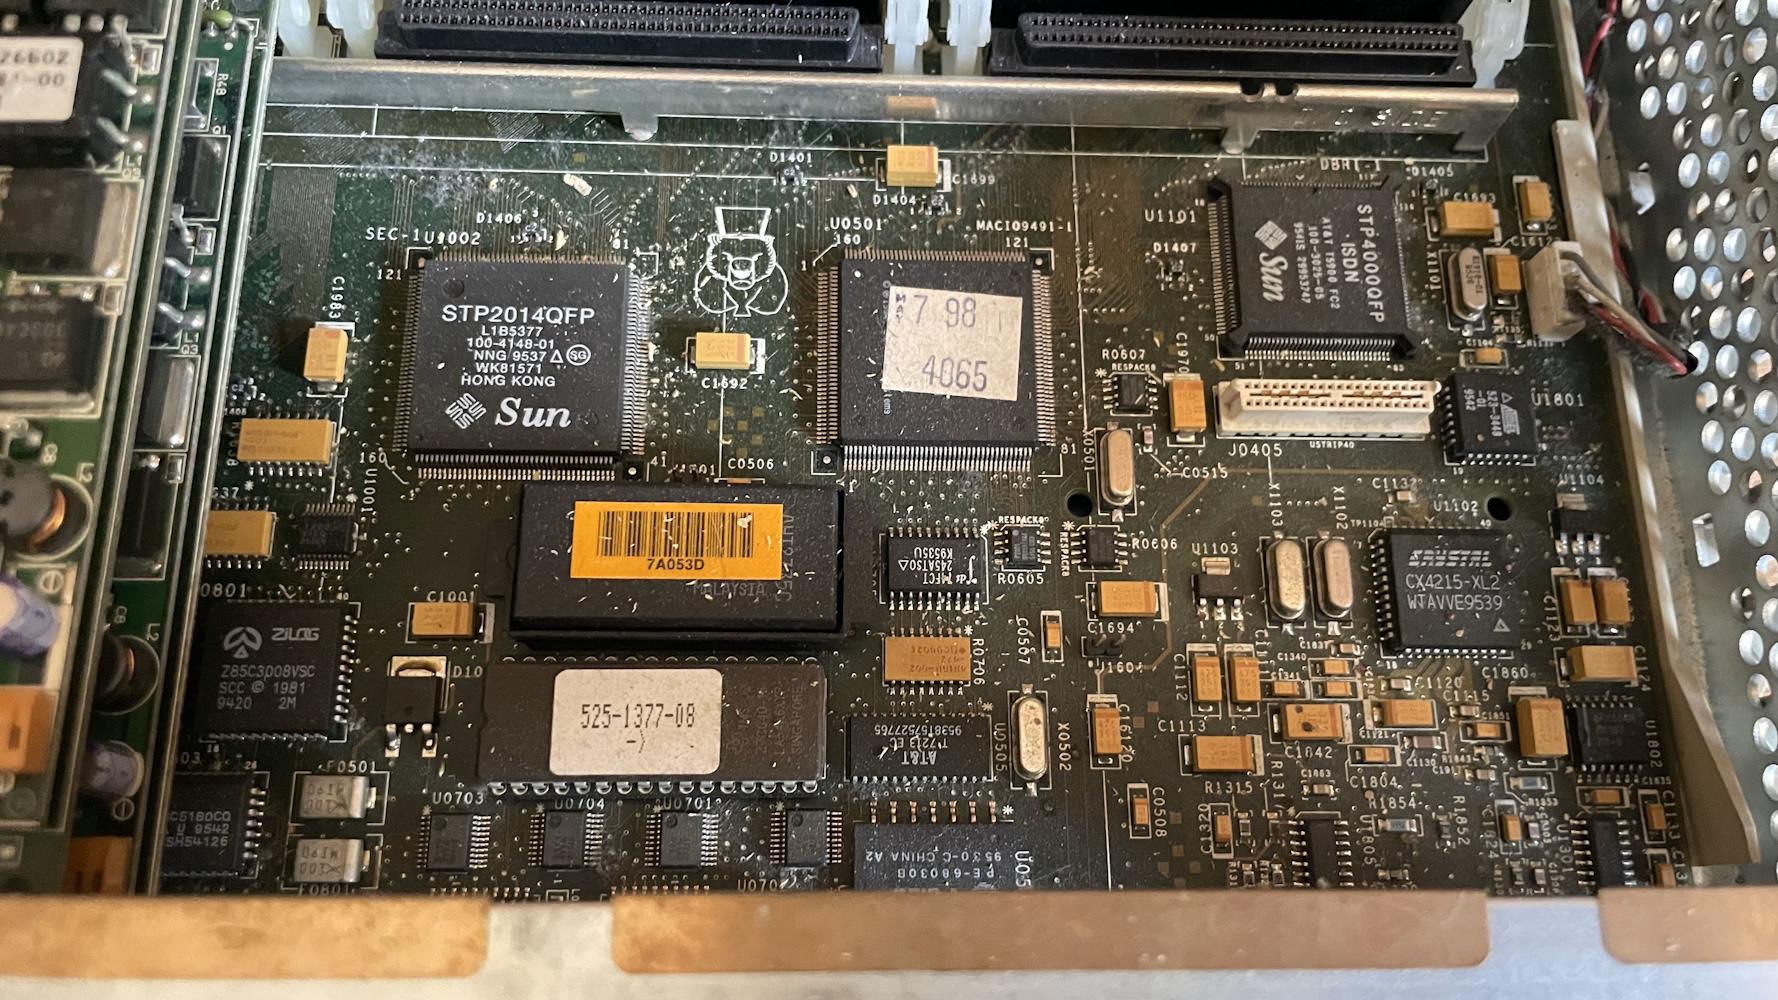
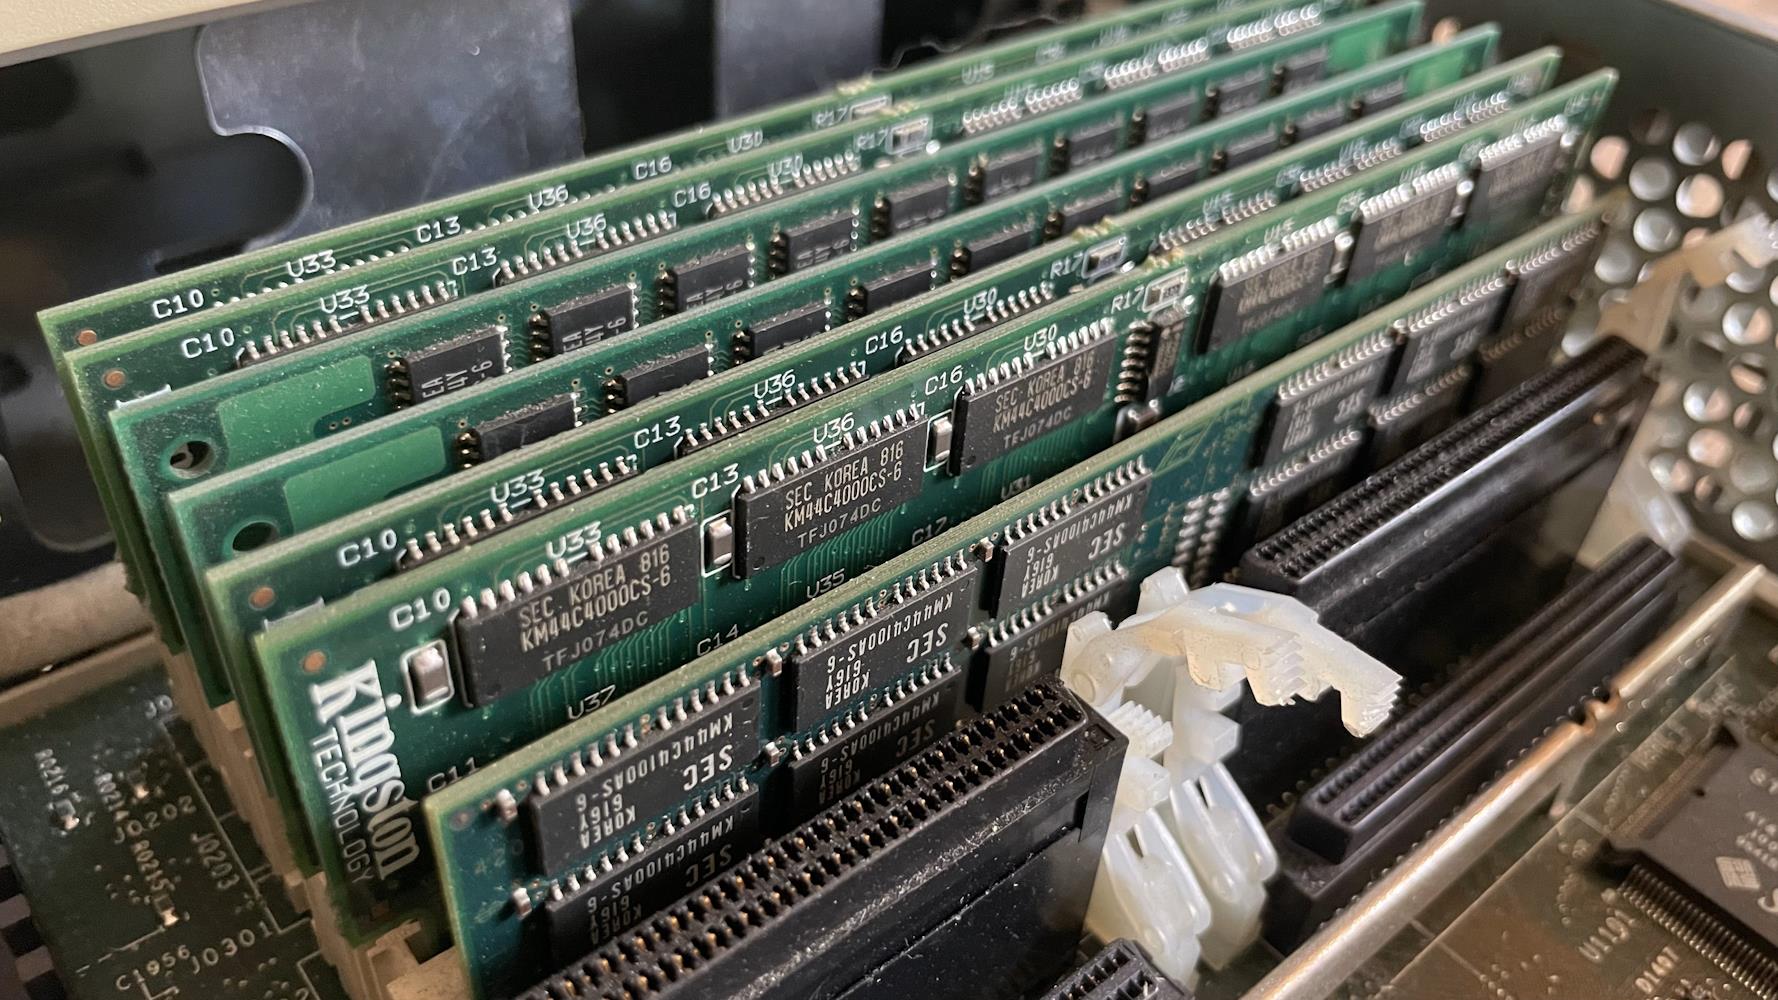
Sun SPARCstation 20
 Click to zoom.
After some stumbles learning about the machine-type byte in the host ID1, this machine was able to get past the NVRAM
check, but failed during memory diagnostics. This output repeated for some 10 minutes before I turned the machine off.
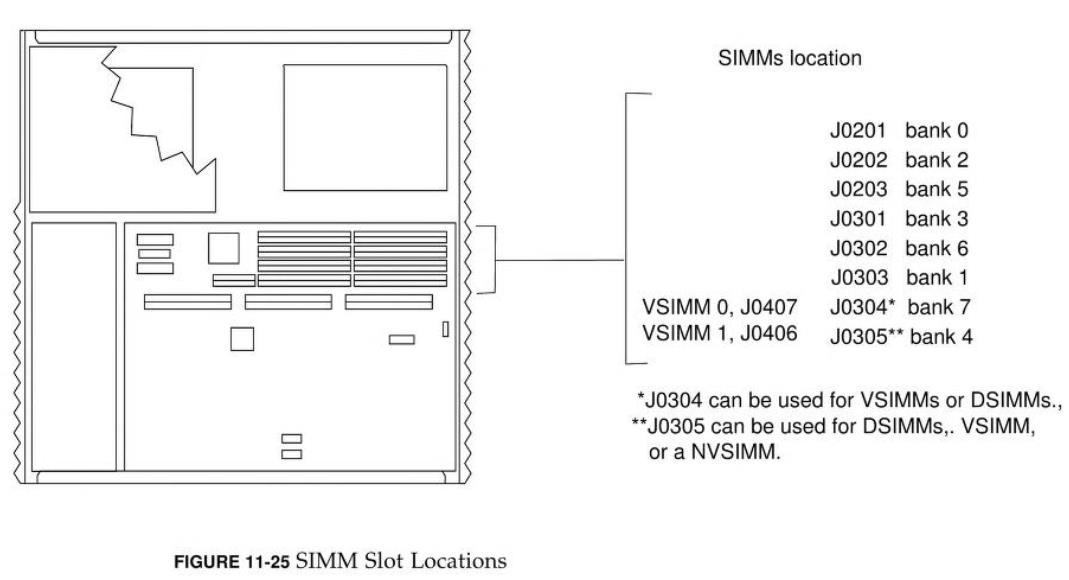
For J0301, it looks like the fourth bit of the lowest byte (0b00010000) is faulty, always set to 0b1. For example,
the pattern 0b10100101 (0xa5) becomes 0b10110101 (0xb5). For J0302, something stranger seems to be happening, as
0b10100101 (0xa5) becomes 0x01001010 (0x4a) and 0b11111111 (0xff) becomes 0b11101111 (0xef).
| U-number3 | Physical Addresses | Expected Value | Observed Value |
|---|---|---|---|
| J0301 | 0x0c4012a8–0x0c4fb2a8 |
0xa5a5a5a5 |
0xa5a5a5b5 |
| J0301 | 0x0c4012a8–0x0c4fb2a8 |
0x00 |
0x10 |
| J0302 | 0x188ff2b8–0x18a011a9 |
0xa5a5a5a5 |
0xa5a5a54a |
| J0302 | 0x188ff2b8–0x18a011a9 |
0xffffffff |
0xffffffef |
One fun detail I noticed poking around this machine: there’s a little bear with a top hat silkscreened onto the motherboard:
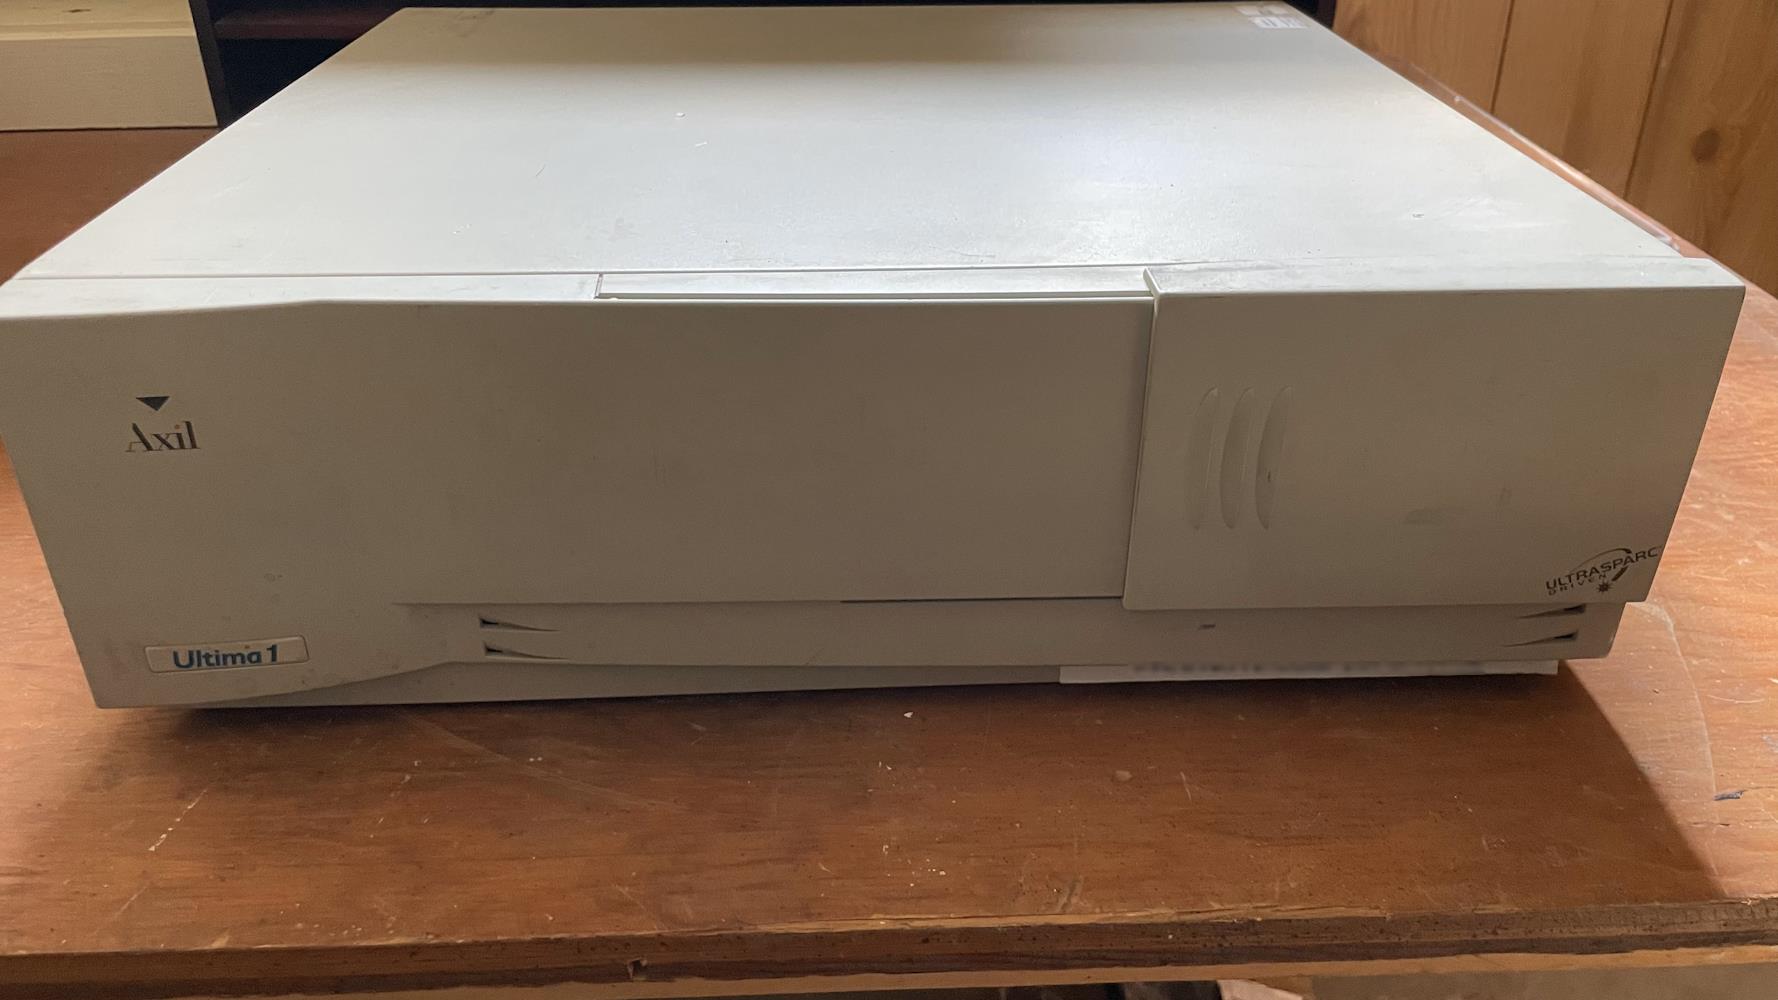
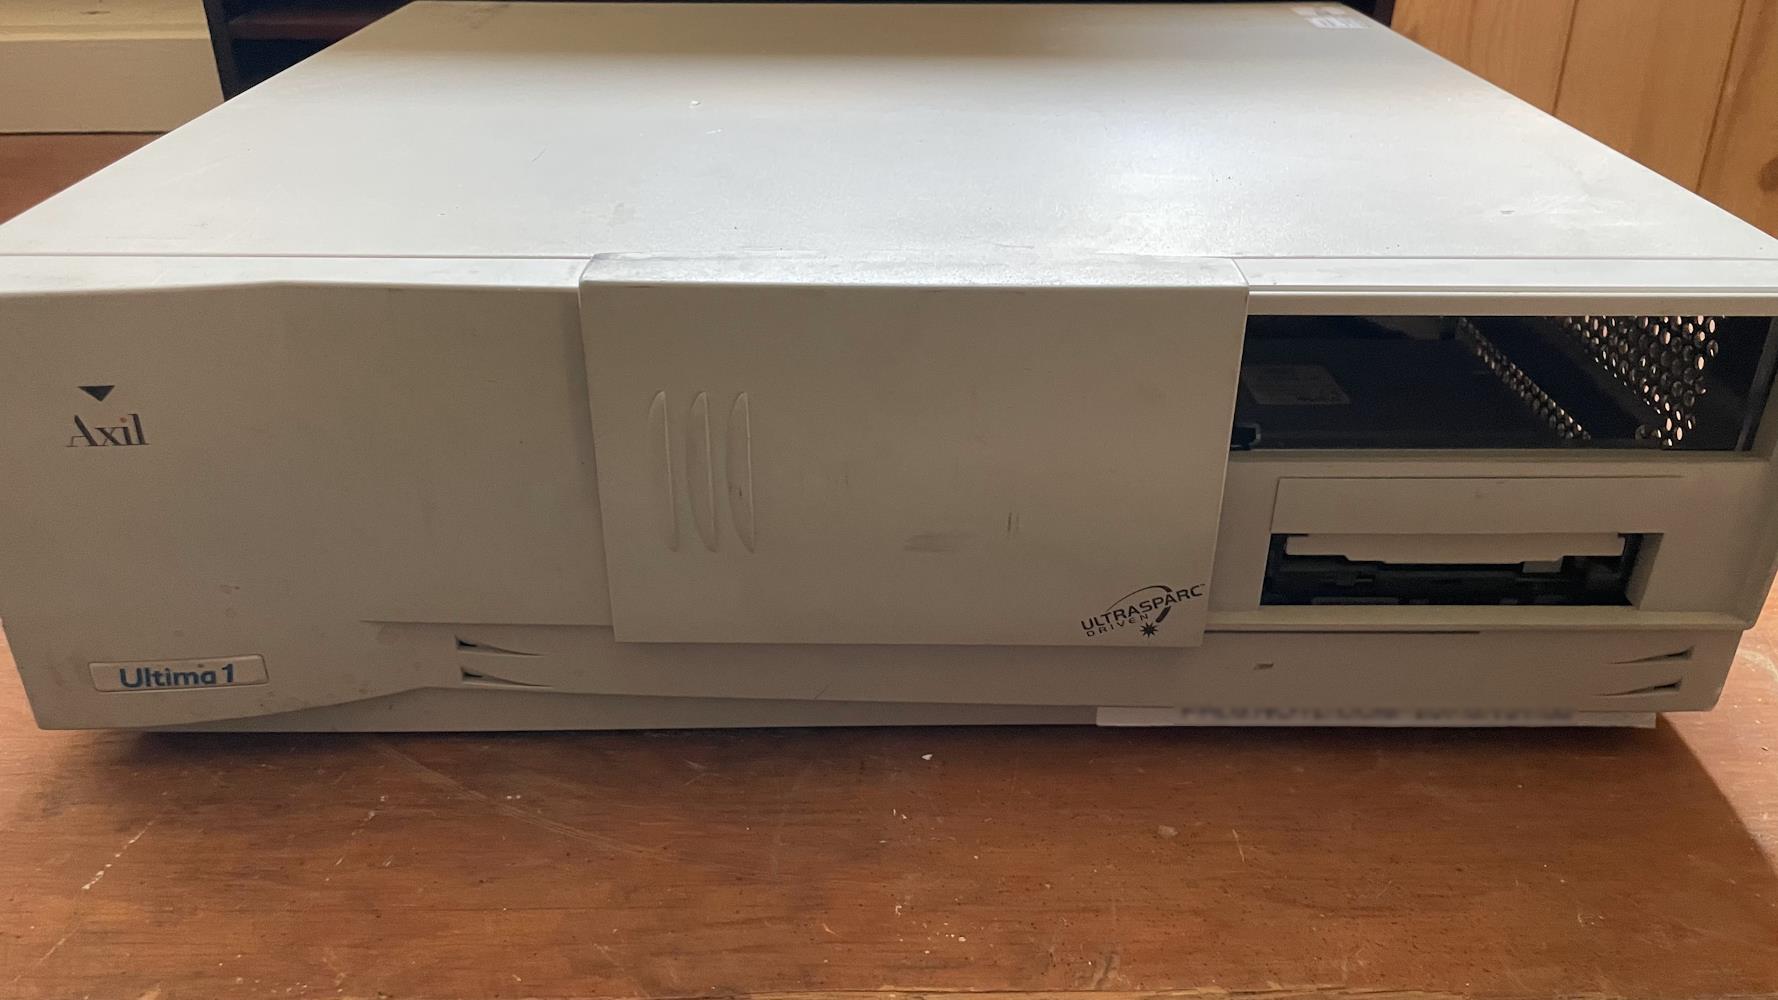
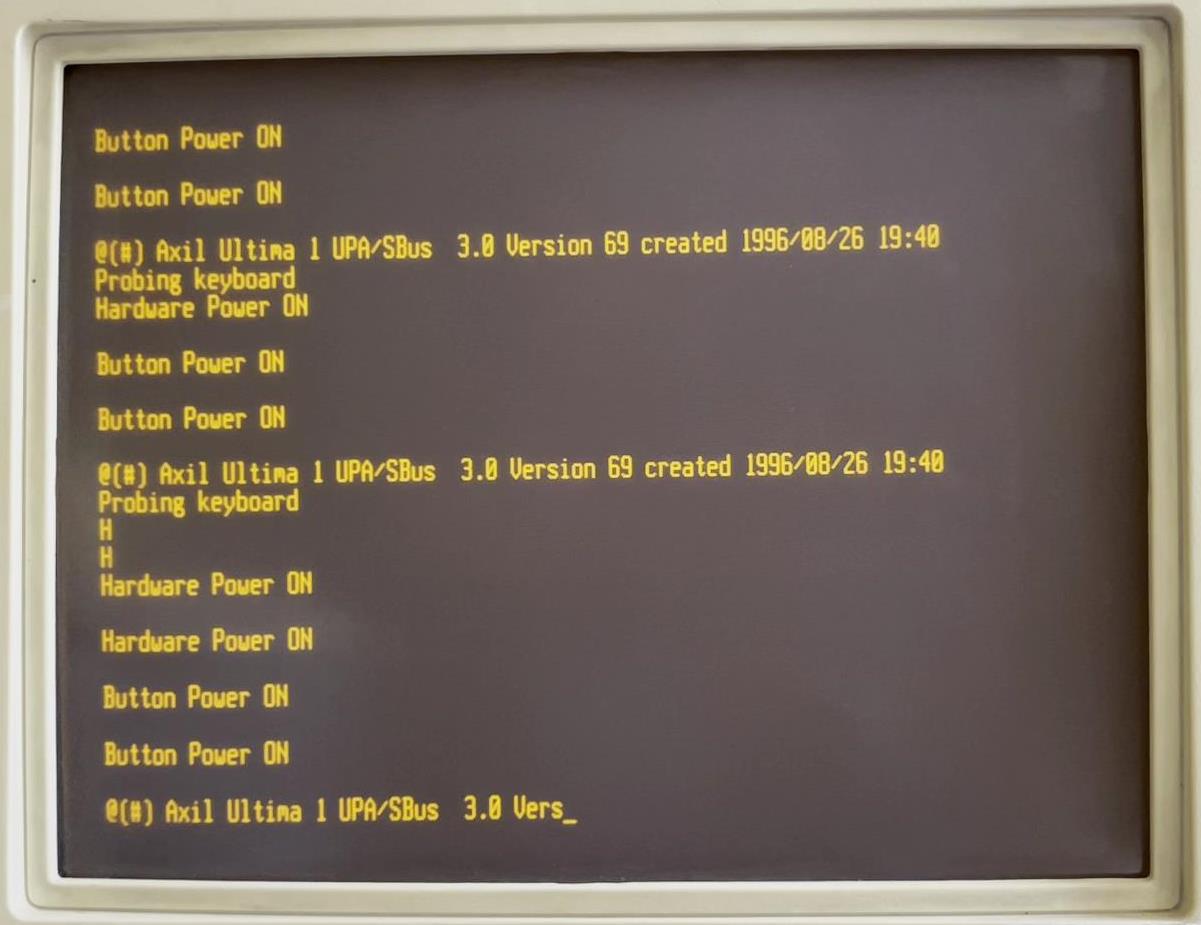
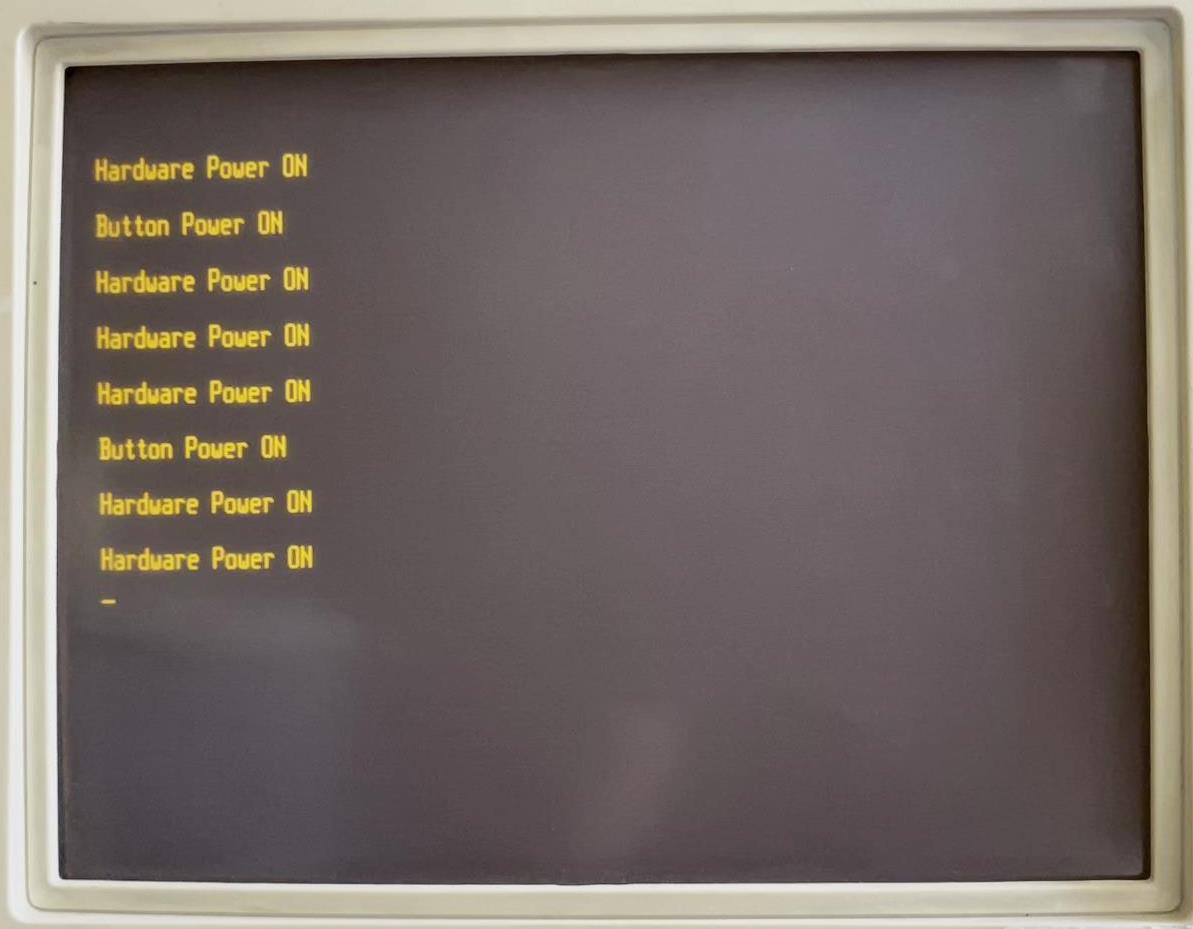
Axil Ultima 1
Perhaps the saddest story here, and a testament to the quality and reliability of original Sun hardware, this Sun clone initially had some struggles booting, and wouldn’t recognize keyboard input. After a couple power cycles, however, it stopped booting altogether.

Notes
I did start writing a section about my efforts last year to boot NetBSD on this machine. I honestly can’t remember if I had much luck in the end, and I was having difficulty repeating these steps and running out of time to work on this project. So I’ve decided to leave this section as-is here at the end; the steps should be technically accurate, but as I said I haven’t had time to verify them and/or finish writing the section. You can check out this page from NetBSD with more instructions if you’re really interested.
Et tu, root-e?
Now that we’ve managed to convince our Sun server to begin booting, there’s a few others problems. First, Solaris
doesn’t support DHCP, and cannot get a IP address; second, it also doesn’t have a configuration for its own hostname.
Let’s look at configuring those. Instead of DHCP, Solaris uses
Now, rarpd package on our Pi, and configure it to know the IP address associated
with our Sun’s MAC.
Checking man rarpd we can note a few important details: first, an association between MAC addresses and hostnames is
configured in /etc/ethers. Second, an association between hostnames and IPs is read from /etc/hosts (this file
already exist on all Linux systems). Third, there’s a section about “bootable images”:
By default rarpd also checks if a bootable image, of a name starting with the IP address in hexadecimal upper-case letters, is present in the TFTP boot directory before it decides whether to respond to the RARP request. The comparison involves exactly the first eight characters, and ignores any additional character. A file name shorter than eight characters in length is unsuccessful. Typically, 192.168.0.122 would correspond to an image named like C0A8007A.SUN.
Ok, that’s a lot to chew on, but the gist is that we can do the following:
b8:27:eb:fc:10:0c pi            # Our Pi
08:00:20:c0:ff:ee SUN.TEST.COM  # Our Sun
127.0.0.1    pi            # Our Pi
192.168.6.37 SUN.TEST.COM  # Our Sun
And as for the bootable images, for now we’ll run rarp without that restriction using the -e parameter. We’ll also
use -d so that the daemon stays connected to the TTY and we can continue to see log messages. Make sure the system
service isn’t running with sudo systemctl stop rarpd. Now we can run sudo rarpd -e -d. Now let’s boot again and see
if we get an IP address.
-
A complete table can be found at the SUN NVRAM/hostid FAQ , but for my purposes
80is the correct value for a Sun Ultra 1, and72is the correct value for a SPARCstation 20. 🔙 🔙2 🔙3 -
I ended up buying an Adaptec ASC-29160 Ultra 3 SCSI controller PCI card to throw in another old computer. This card can be found pretty easily on eBay, and only cost me $14 USD with shipping. It has 68- and 50-pin SCSI headers, but the disks in my Sun servers are 80-pin, so I also had to purchase an 80-to-68 pin adaptor ($22 USD shipped from eBay). Using this and a CloneZilla disk I was able to clone entire disk images for posterity and inspection. I believe this is also how I got the root password cleared, but I was also messing around with net-booting at the time and I honestly can’t remember which method ended up working. 🔙
-
This is the SIM slot identifier. On a SPARCstation 20, J0301 is “bank 3”, physical addresses 0x0c000000–0x0fffffff, and J0302 is “bank 6”, physical addresses 0x18000000–0x1bffffff. See SPARCstation 20 Service Manual, p.35: §SIMM Errors on Archive.org.
 🔙
🔙
Webmentions ♥️0
 TheStartupChime
Webmention support enabled by webmention.io and Webmentions for Jekyll.
-
{% for webmention in webmentions %}
-
{{ webmention.content }}
{% endfor %}
No bookmarks were found.
{% endif %}-
{% for webmention in webmentions %}
-
No likes were found.
{% endif %}-
{% for webmention in webmentions %}
-
{{ webmention.content }}
{% endfor %}
No links were found.
{% endif %}-
{% for webmention in webmentions %}
- {{ webmention.title }} {% endfor %}
No posts were found.
{% endif %}-
{% for webmention in webmentions %}
-
{{ webmention.content }}{% if webmention.author %} {% if webmention.author.photo %}
{% endif %} {{ webmention.author.name }} {% endif %} {% if webmention.pubdate and webmention.author %}on{% endif %} {% if webmention.pubdate %} {% endif %}
{% endfor %}
No replies were found.
{% endif %}-
{% for webmention in webmentions %}
-
No reposts were found.
{% endif %}-
{% for webmention in webmentions %}
- {% endfor %}
No RSVPs were found.
{% endif %}-
{% for webmention in webmentions %}
-
{% if webmention.author %} {% endif %} {% if webmention.content %} {{ webmention.content }} {% else %} {{ webmention.title }} {% endif %}
{% endfor %}
No webmentions were found.
{% endif %}
Comments from Mastodon
You can leave a comment by replying to this Mastodon post from any ActivityPub-capable social network that can exchange replies with Mastodon.
Comment support inspired by Cassidy James (@cassidy@blaede.family) and some code borrowed from Julian Fietkau (@julian@fietkau.social).